開始使用 JSOM 編輯器
How to download and install JOSM, the Java OpenStreetMap editor, change some of the settings, open a sample map and learn some of the basic operations of the software. Remember in the introduction chapter when we asked you to draw a map of your town or village? We will conclude this chapter by drawing your map again, this time digitally. After this you should have a good understanding of how to draw maps in JOSM.
下載 JOSM
- If you have a copy of JOSM on a CD or usb flash drive, you can skip to the next section, Install JOSM.
- If you don’t have JOSM already, or want the newest version, open your web browser - this may be Firefox, Chrome, Opera, or Internet Explorer.
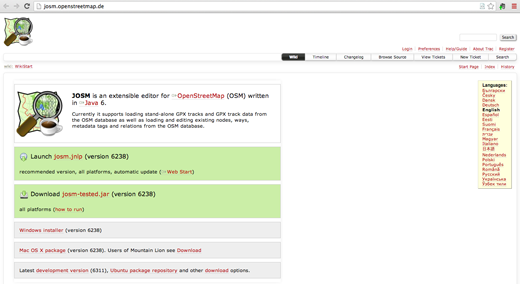
- In the address bar at the top of the window, enter the following text and press Enter: josm.openstreetmap.de
- You can also find the JOSM website by searching the internet for “JOSM”.
-
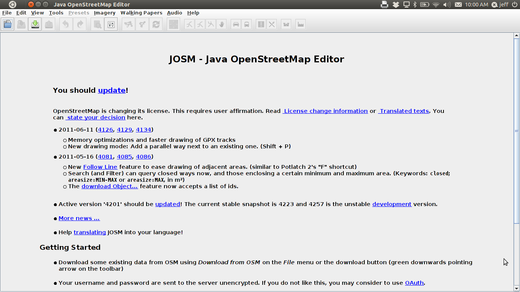
The website should look something like this:
-
If you have Windows installed on your computer, click “Windows Installer” to download JOSM.

- If you have a different operating system, click on the link for your system. Your download should begin. In this chapter we will assume that you are using Windows, but the instructions are similar for other operating systems.
安裝 JOSM
You may have problems installing JOSM if Java is not already installed on your computer. If you have problems in this section, try downloading and installing Java. You can download it here: http://www.java.com/en/download/
Mac users may have old versions of Java. Please see http://wiki.openstreetmap.org/wiki/JOSM/Mac#Installation for options for OSX 10.6 and 10.7.3+
JOSM 設定
There are many different settings that you can customize in JOSM. One setting that you may want to adjust is the language. JOSM has been translated into numerous languages, and you may prefer to work in a different one.
-
To access the Preferences window, click Edit -> Preferences.
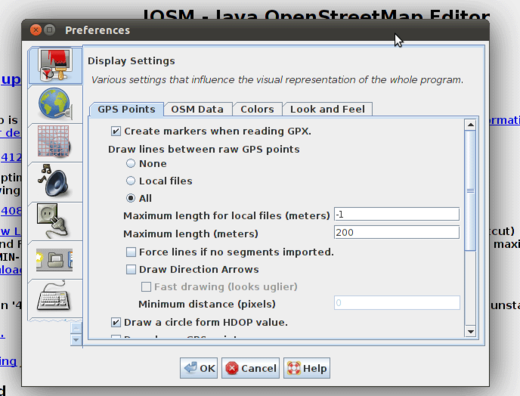
- On the left side, click the icon that looks like a paint can and paint brush.
- At the top of the window, click the tab that says “Look and Feel”.
-
Choose your language in the dropdown box next to the word “Language”.
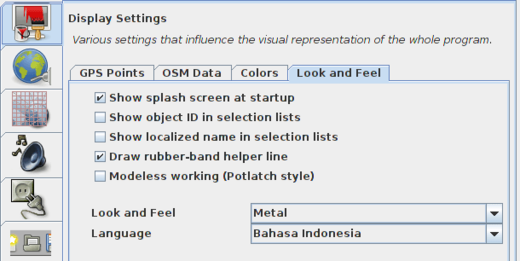
- Click OK.
- You need to restart JOSM to save your settings. Click “File” in the upper left corner, and Click “Restart” near the bottom of the menu.
學習 JOSM 的基本繪圖方法
基本操作
- To move the map left or right, up or down, hold your right mouse button down, and move your mouse.
-
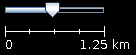
There are several ways to zoom in and out of the map. If you have a mouse, you can use your scroll wheel to zoom in and out. If you are using a laptop and don’t have a mouse, you can zoom in and out using the scale bar in the upper left of the map window. Drag the bar left and right by holding your left mouse down and moving the bar left or right with your mouse.
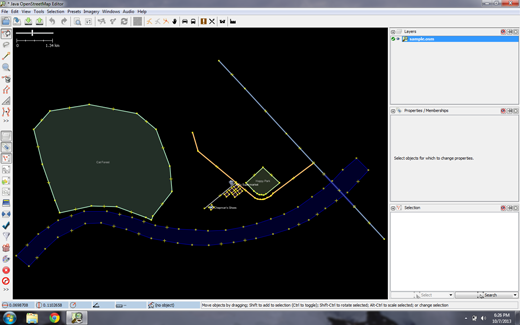
- Look at the sample map. There a few different types of objects here. There is a river, a forest, some buildings, several roads, and a couple of shops. To select an object, click on it with your left mouse button.
點、線、面
- As you click different objects on the sample map, notice that there are three different types of objects on the map. There are points, lines, and shapes.
- Points are a single location, represented by symbols. On this sample map, there are two points, a shoe shop and a supermarket. The shoe shop is represented by a shoe symbol, and the market is represented by a shopping cart.
- There are several lines on the map as well, which represent roads. If you look closely you will see that within the lines, there are points as well. These points don’t have any symbols or other information associated with them, but they help to define where the line is located.
- Lastly, there are numerous shapes on the sample map, representing different places - a forest, a river, a park, and buildings. A shape is used to represent an area, like a field or a building. A shape is exactly like a line - the only difference is that the line begins at the same point where it ends.
一幅地圖很容易理解成包含這三類基本物件——
點、線、面。而在開放街圖,有專門的描述術語,
來稱呼這些物件,你很快就會在學習的過程學到。
節點(node),線被稱為路徑(way),面被稱為封閉路徑(closed way),
這是因為面本身就是一條線條上,開始的點會連回原先相同的點而結束
- You may notice that when you select an object, a list appears to the right of the map in a window called “Properties”. These are known as tags. Tags are information that is tied to a point, line or shape that describes what it is. We’ll learn more about tags in a later chapter. For now all you need to know is that this information helps describe whether our object is a forest, a river, a building, or something else.
- Think about drawing a map by hand, and how you are also drawing points, lines, and shapes. What other places are best represented by points? Lines? Shapes?
改變物件
- Select the forest on the left side of the map. Be sure to click on the line around the forest, not one of the points on the line. Now hold your left mouse button down and drag your mouse. You should be able to move the forest to a new location on the map.
- Click on one of the points on the line around the forest. Hold your left mouse button down and drag your mouse. You should be able to move the point. This is how you can change the shape of an object, or move a point.
繪製
- On the left side of JOSM is a column of buttons. Many of these buttons open new windows on the right side that provide more information about the map. The most important buttons, however, are at the top of these column. These buttons change what you can do with your mouse.
- The top buttons in this column are the ones you will use the most. They are used for selecting objects and for drawing new ones.
-
Until now, you have been using the Select tool, which looks like this:

- Before you draw, you need to make sure that nothing is selected. Click in the black space on the map, where it is empty, to make sure nothing is selected.
-
Click on the second button, the Draw tool.

- Find an empty area on the map, and double-click with your mouse. This will draw a single point.
- To draw a line, single-click with your mouse. Move your mouse and click again. Continue until you are happy with your line. To end the line, double-click your mouse.
- Draw a shape the same way that you draw a line, but finish the shape by double-clicking on the point where you started the line.
增加預設組合
自己的地圖自己畫
- Now let’s draw a map in order to practice the techniques you have learned. You may wish to redraw the map that you drew on paper previously.
- Drag the map away from the sample map. Hold the right mouse button and drag your mouse, until you have a nice empty area to draw on.
- Use the Draw tool to create points, lines, and shapes. Describe what your objects are by selecting from the Presets menu.
- When you are finished, you should have your own map, similar to the sample map that we opened in sample.osm.
Remove the sample layer
一旦你熟悉這些基本的編輯技巧,
你也許想要繪製地圖上真正的圖徵。
It is very important that you first remove the layer with the sample data.
這些資料都是虛構的資料,
database (newer JOSM releases automatically prevent this).
選擇右上角的圖層視窗中選擇範例圖層。
接著點視窗右下角的垃圾筒圖示。
或者另一個選擇是在圖層選項選擇刪除。
要繼續編輯的話,你必須先下載真正的資料。
下一章節將會解釋做什麼。
總結
太棒了!如果你能學會怎麼在你的電腦安裝 JOSM,
和怎麼用基本工具繪製地圖。
下一個章節會進一步介紹用 JOSM 畫 OMS 地圖的流程。
|