|
|
Керівництво користувача Менеджера завданьЯкщо інтерфейс користувача для вашої версії відрізняється від того, що описаний тут, зверніться до сторінки огляду версій Менеджера завдань
Менеджер завдань є одним із популярних інструментів для координації спільних зусиль для мапінгу в OpenStreetMap.
Ви можете скористатись Менеджером завдань HOT, щоб негайно розпочати мапити для потреб гуманітарних організацій та надання ними допомоги на місцях. Менеджер завдань – один з інструментів, що наявні в екосистемі OpenStreetMap. Коли ви робите свій внесок в OpenStreetMap користуючись Менеджером завдань, ви насправді використовуєте досить багато різних інструментів:
Призначенням Менеджера завдань є представлення певного регіону у вигляді, розділеного на невеличкі шматки-“завдання”, проєкту. Кожне таке завдання може бути обране та заблоковане мапером для виконання, це дозволяє уникнути випадків створення дублікатів об’єктів та конфліктів в даних. Після завершення роботи зі своїм завданням, мапер повідомляє через Менеджер завдань що воно закінчене, і він може переходити до наступного, не зайнятого, завдання продовжуючи робити внесок в OpenStreetMap. Досвідчені мапери перевірять кожне із завершених завдань, щоб переконатись у якості даних доданих в OpenStreetMap на відповідність встановленим критеріям. Очевидно, що вони можуть як ухвалити завершене завдання, так і повернути його на доопрацювання, вказавши що має буту покращено. Короткий посібник
Процес мапінгу
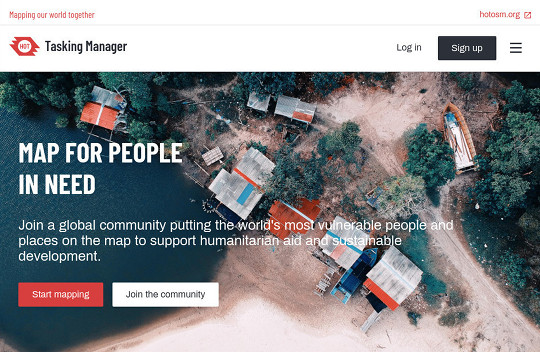
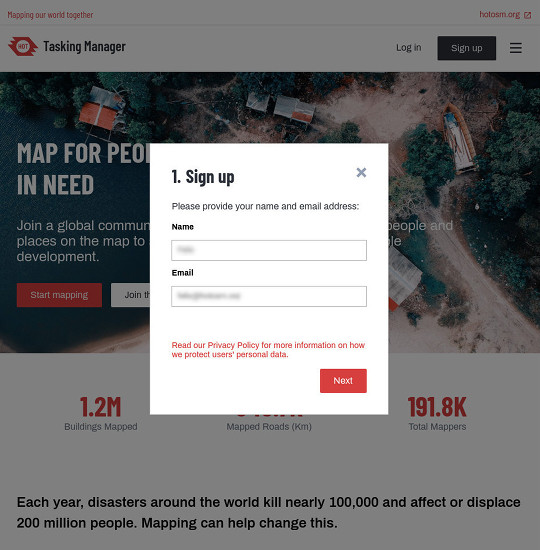
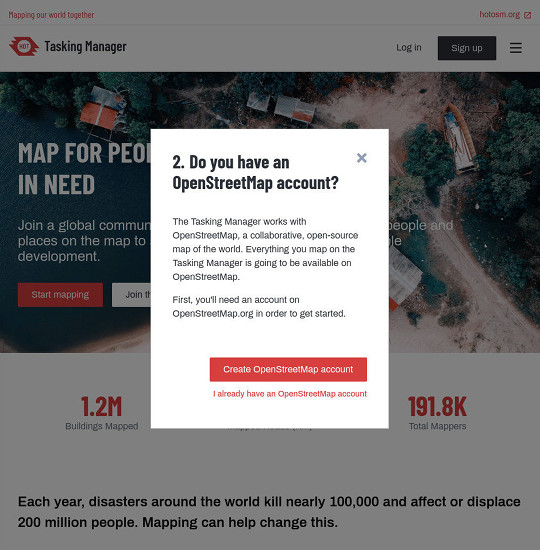
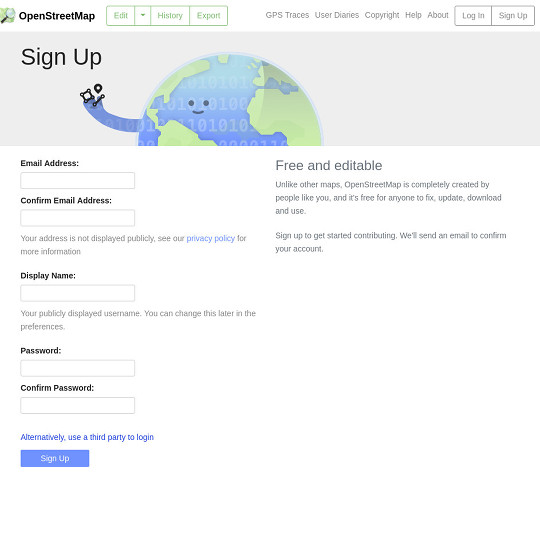
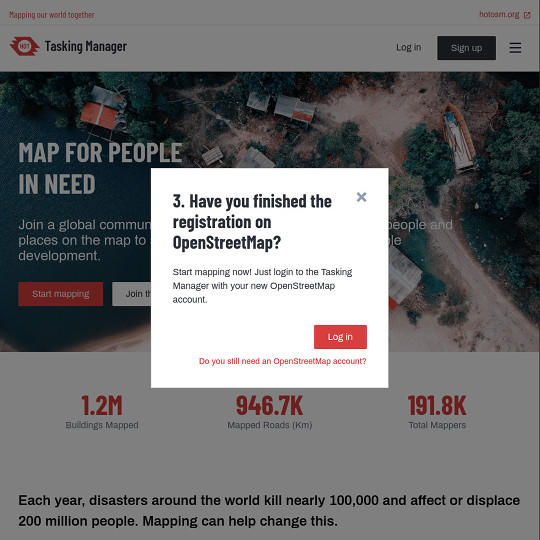
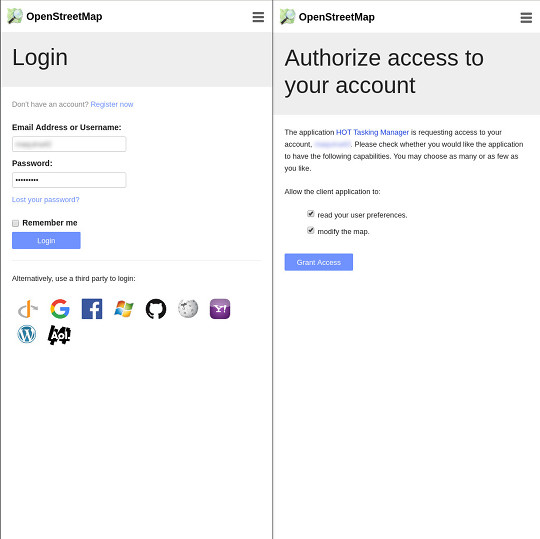
Вхід до Менеджера завданьМенеджер завдань – інструмент який дозволяє координувати спільний мапінг в OpenStreetMap. Він використовує облікові запис OpenStreetMap для входу. Це означає, що вам не треба створювати окремий обліковий запис в Менеджері завдань, але вам потрібно мати обліковий запис в OpenStreetMap та увійти до нього на OpenStreetMap.org перед тим як ви зможете користуватись Менеджером завдань для мапінгу. Під час відвідування Менеджера завдань ви можете обрати між кнопками Якщо ви вже маєте обліковий запис OpenStreetMap, натисніть
У новій вкладці ви зможете створити обліковий запис на OpenStreetMap.org. Вкажіть потрібні дані та натисніть
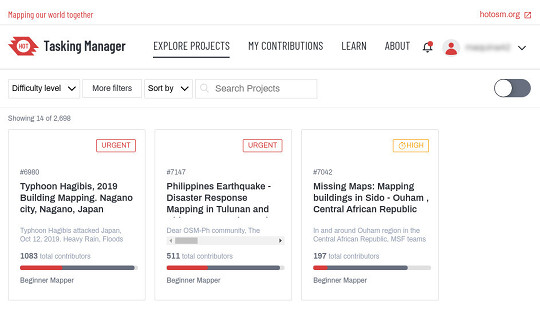
Менеджер завдань чекатимете вас на сусідній вкладці, перейдіть до неї та натисніть
Налаштування
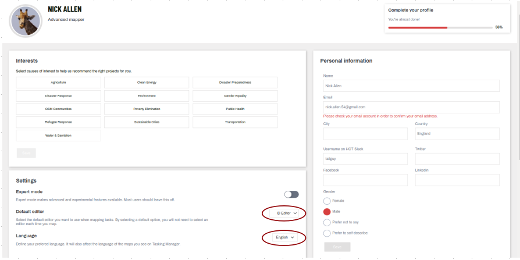
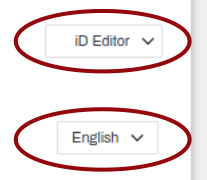
На початку Менеджер завдані показується англійською, для зміни мови натисніть English. Тут також ви можете:
Пошук прєктів
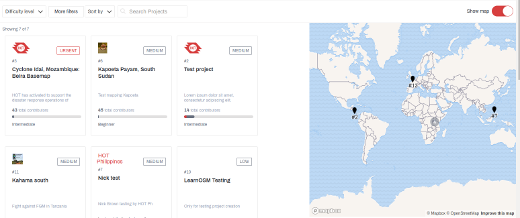
Вікно з проєктами розділено на три основних зони:
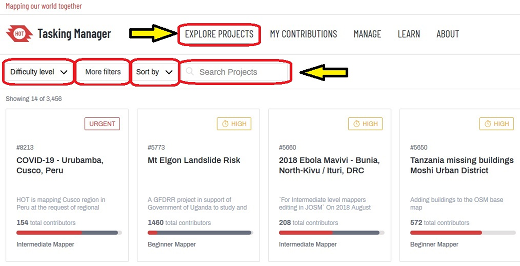
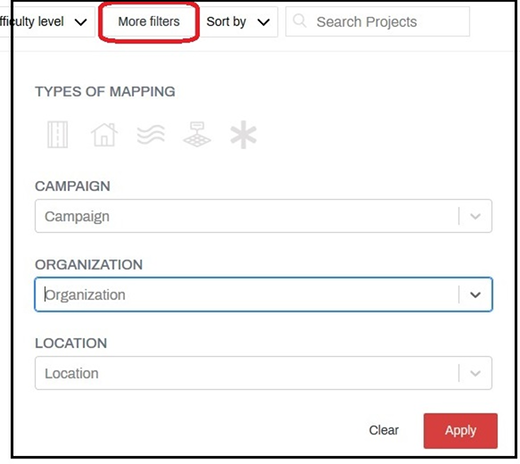
Пошук та фільтрування проєктівТипово, показуються всі проєкти доступні для мапінгу. Ви можете використовувати Пошук для скорочення цього переліку проєктів до тих що цікаві саме для вас.
Мапа дозволяє вам бачити проєкти на мапі, як окремо, так і згуртовано, якщо кілька проєктів знаходяться поруч один до одного. Наблизьтесь щоб побачити більше деталей та обрати відповідний проєкт, клацнувши по ньому на мапі.
Статистика участі в проєкті
Значки показують що треба мапити, наприклад:
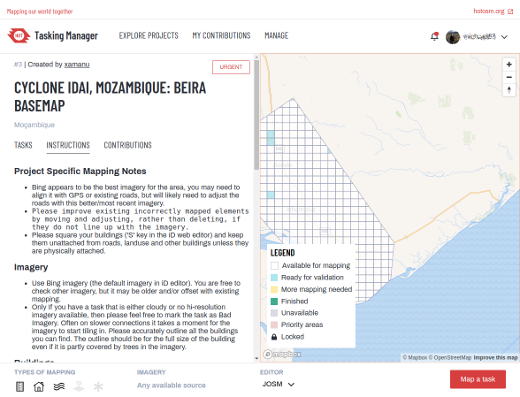
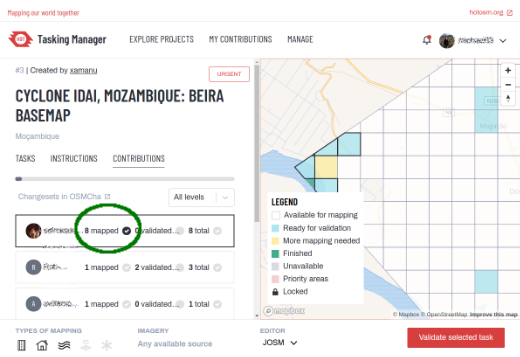
Сторінка завдань проєктуЦе ваш основний екран під час роботи з проєктом. Він поділений на дві основні частини. Ліворуч – панель з вкладками:
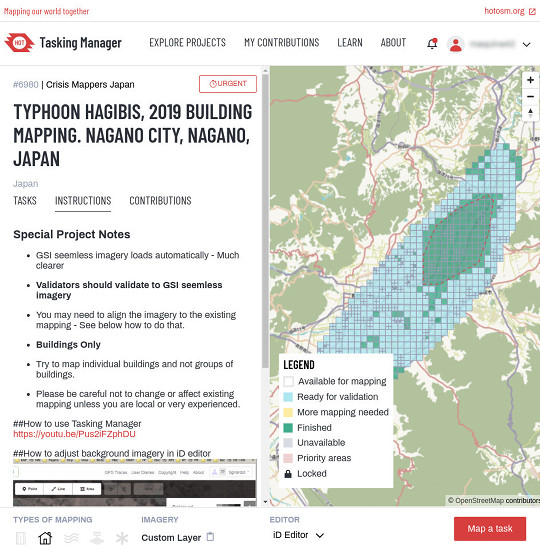
The right side of the screen is a map showing the tasks (often squares) coloured according to their status. Tasks that are available to you can be selected by clicking on them.
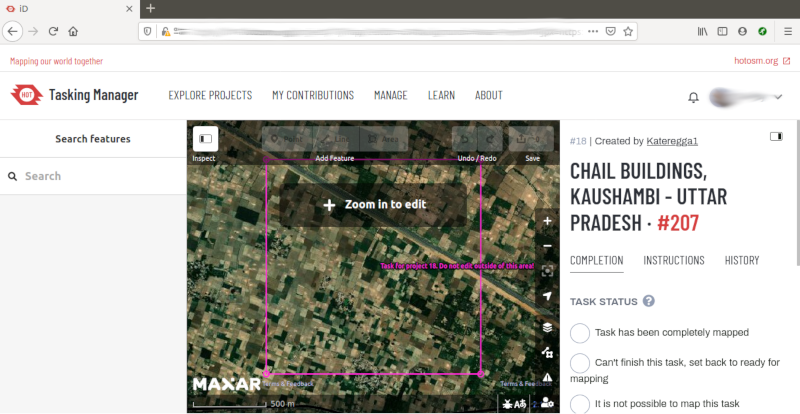
Although you may have set your preferred editor within your preferences page, you do have the option of changing editor just for the task you are about to select. Choice of EditorsDifferent options for editing are presented to you as soon as you lock a task. Edit with JOSMStart JOSM before using this link and it will automatically load the existing OSM data into JOSM.
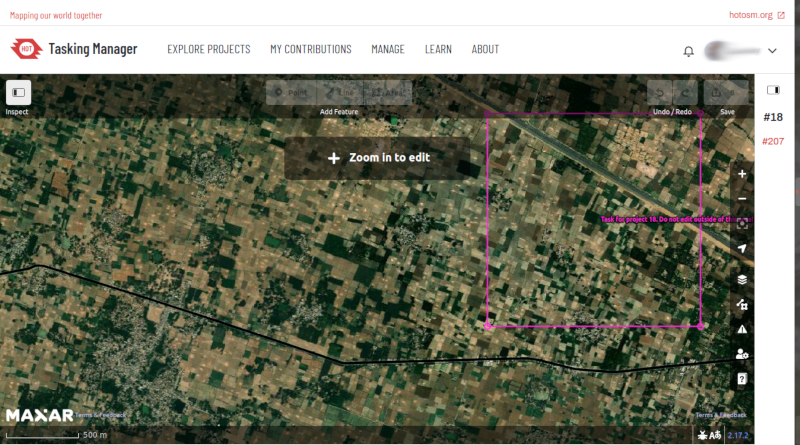
iD editorSelect this to automatically start the OpenStreetMap iD editor within the Task Manager of your web browser, with existing OSM data loaded. The Internet Explorer web browser does not currently support iD and it will load Potlatch 2 instead. Potlatch 2The editor will load in a new window or tab. Potlatch will not automatically display the task bounding box at this stage. Field PapersFor use only when you are involved in a project where a local mapper has carried out a ground survey and marked a printed map with information such as road names. This map can be rescanned and used as a background image for a remote or local mapper to read the information and update the OpenStreeetMap data Field papers section of LearnOSM. Select a task to map
Just to confirm - Clicking on the Start Mapping button, or locking your square from the map, locks the task so that no other mapper can select it until it is released again, and starts a 2 hour (120 minute) countdown timer, at the end of which time the task is automatically released. It is easy to become engrossed in your mapping and not realise your task has been released, and has now been selected by another mapper who has started mapping it too. This can lead to conflicts and problems.
Splitting a task squareHaving selected your task and inspected it with the imagery in place, you may realise that there is far too much detail required for mapping. An example of this may be tracing buildings in dense urban areas, or locating small villages in large areas. As guidance, where it isn’t possible for one person to complete within the 2 hour time limit you can often split the task into 4 smaller areas. Use with caution - if/when task squares are split too small it is difficult to judge what type of highway is involved, and to identify other features.
Submit your mapping task
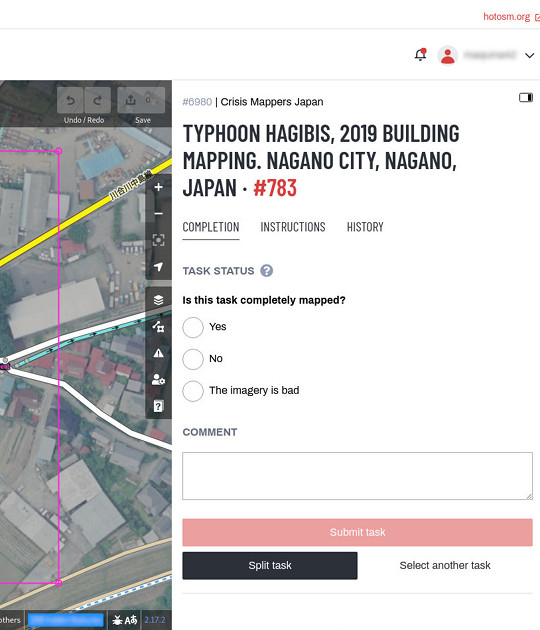
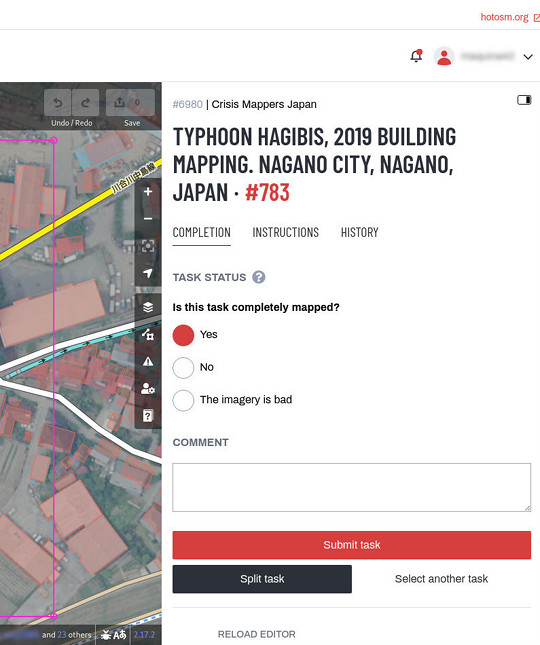
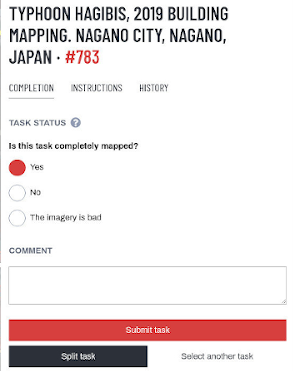
Unlocking a Task before it is completeIf you start working on a task, but cannot complete it for some reason, it is best practice to leave a comment in it. Simply detail what remains and choose For example: If you didn’t map at all, you can just go back without leaving any comment by choosing Submit a task that is completely mappedOnce you are done you can save all changes to OpenStreetMap:
Marking a Task as Bad ImageryYou will sometimes select a task that can not be mapped because the imagery is low resolution or has cloud cover. In this case please indicate Sending a message from the comment boxWhen leaving a comment against a task, you can have the comment sent as a message to a named mapper. Much like Twitter, simply use an @ followed by the username. This will send a message to the user containing the comments from this box, plus a link to the task that the comments box relates to. For example: This is particularly useful when validating or adding on another’s previous work - you can provide feedback, thanks or more.
Getting helpFor questions which might require a little research to answer or more detailed explanations, usually the best channel is to write to mapper-support@hotosm.org Live text based help
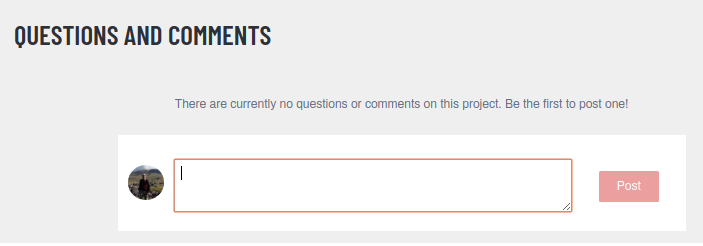
Leaving a Project question / comment / contacting the Project creatorUsing the “Comments” tab for the project you can see other users’ questions and comments and leave one of your own. All comments are public and it is not live chat. Use the Slack option above if you need immediate attention.
Editing hints and tipsBy now you have a good understanding of what the Tasking Manager is, and some of the various functions it supports. Unlike normal editing, this tool is often used for time critical projects with many participants - this may be a little bit different to what you are used to. Some general advice to heed when working in this tool:
ValidationValidation is the process of an experienced mapper reviewing the mapping of the initial mapper of a project task. It is designed to confirm that the mapping is complete and the quality of the data is good. It is also there to give encouragement to mappers by thanking them for their time, confirming that their mapping is good or giving instructions on how to improve their mapping. The most effective practice is to find beginner mappers at the early stages of their mapping, putting their mind at ease and giving them confidence by confirming that they are doing the right thing, or helping them to correct any errors that they may have before they have mapped too many tasks. This reduces the amount of fixing required at a later stage to get their mapping up to standard and gives them the encouragement in knowing that they are supported in what they are doing. Your User ProfileThe Tasking Manager 4 has a number of changes that affect the data available for doing validation. Please make visiting your user profile your first activity in the new Tasking Manager, by selecting Settings from the popdown menu under your OpenStreetMap (OSM) user name in the upper right corner. • Under Personal Information make sure you have filled in your preferred email address. • Under Settings switch on Expert Mode and select your default editor and preferred language. • You can also choose what notifications you wish to receive. Getting StartedTo get started click on Explore Projects on the top bar of the page. On the Projects page you can click on any of the projects to go to that project or you can use the range of filters for selecting the project or projects you wish to see or select from.
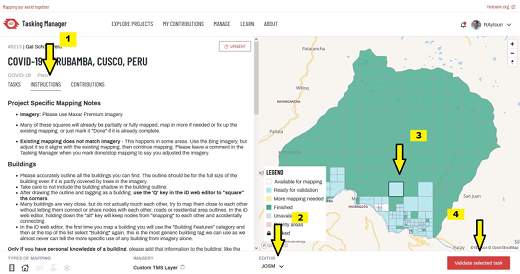
After filtering and/or selecting the project you want to work on, scroll down to the bottom of the next page to Questions and Comments to see any messages left by previous mappers/validators regarding the project. Then in the bottom right click on the red button Contribute to move to the next page. This page should open with the project instructions visible (1). If not then select Instructions. Read the instructions to understand what imagery is to be used and what the mappers have been asked to do. This will give you an understanding of why the mappers are mapping the way they do and if the instructions are misleading and the mappers are consistently getting it wrong because of that then you can contact the Project Manager to change the instructions to reduce the effects of that happening.
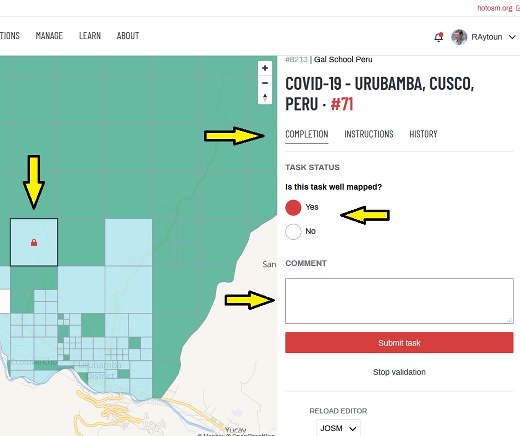
Check that you have the correct Editor (2) Select a blue task to validate (3) Click on the red button Validate selected task at the bottom right (4) A new page will open in the Tasking Manager and the selected task will be loaded into your editor. On this page your task will have a red padlock, other tasks locked will have black padlocks. You are still able to access the Instructions on this page. You can see who has mapped or validated this task in the History and access their profile and statistics by clicking on their name. Selecting Multiple Tasks for ValidationIf the mapper has more than one task completed then they will be selected on the map if you press on one of the numbers. You can download all the tasks in one go to validate. They will automatically adjust your JOSM/iD window to accommodate all of them.
Depending on which editor you are using, this feature will behave differently. In JOSM, a second OSM data layer will be created titled “Task Boundaries - Do Not Edit or Upload” and it will have uploading disabled in recent versions of JOSM. JOSM will not download the OSM data because it could be a very large amount of data. Instead you will have to use the task boundaries as a guide and download the data to the active editing layer manually. Finalizing ValidationTo validate/invalidate a task you need to select Yes/No under Is this task well mapped, then enter your comment, then click the red button Submit task to save before selecting another task. If you want to leave without changing the status of the task leave a comment then click on Stop validation.
For those two choices you can and should leave a friendly, encouraging comment addressed to the mapper(s) involved and provide thanks for their contributions and feedback on their mapping. Please be considerate before marking a task as invalid. If just a few bits are missing add them yourself, explain what was missing in your comment but nevertheless mark the task as valid. New mappers will consider their completed task marked as invalid as a fairly harsh comment. You can access a mapper’s statistics on their profile page at https://tasks.hotosm.org/users/username.
Чи був цей розділ корисним?
Дайте нам знати та допоможіть нам покращити цей посібник!
|

 Або ж, ви можете самі обрати будь-яке завдання з наявних, клацнувши по ньому на мапі та натиснувши на кнопку
 Після цього, ви можете повернутись до кроку 7 та обрати інше завдання для мапінгу. Дякуємо за ваш внесок в OpenStreetMap!
 значок зверху праворуч.
 Кнопка

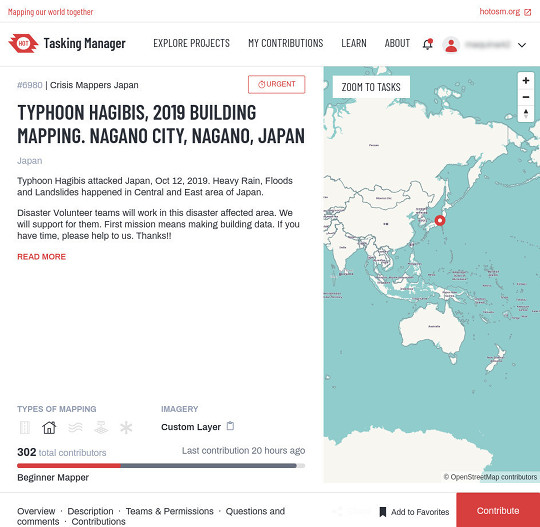
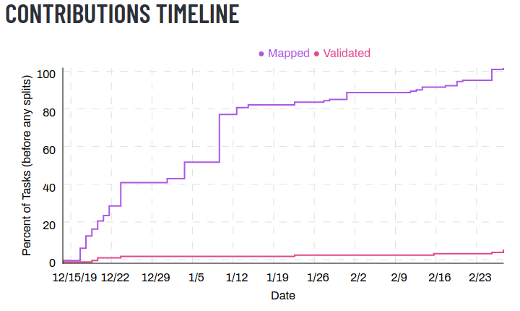 Після того як ви визначились з проєктом, в якому бажаєте взяти участь, клацніть на нього, щоб ознайомитись з ним більш докладно. Прочитайте уважно опис, прогорніть сторінку вниз щоб отримати більше інформації, наприклад, яка організація здійснює координацію мапінгу цього проєкту, хто може перевіряти завершені завдання, коментарі від учасників, графік виконання та перелік учасників.
 Кнопка
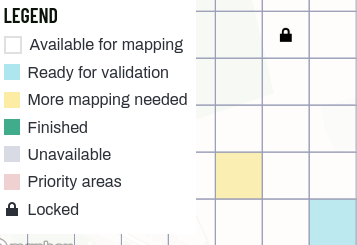
 are locked by another mapper
 The button
  Once you have locked your Task, and your square (Task) boundary shown. You can still click on the tabs for:
 Повернутись до початку сторінки