- Other guides
- Guia de Iniciante
- JOSM - Edição Detalhada
- Getting Started with JOSM
- O processo de edição do JOSM
- Editing Field Data
- Ferramentas de edição do JOSM
- Módulos JOSM
- JOSM Building Tools & Utilsplugin2 plugins
- JOSM Presets
- JOSM - Creating Custom Presets
- JOSM Relations
- Aerial Imagery
- JOSM adding tms, wms or wmts imagery
- Correcting Imagery Offset
- Coordenação
- Mapeando com um Telemóvel, GPS ou Papel
- OSM Data
- HOT Tips - Getting started for new mappers - iD editor
- Outros Recursos
|
|
JOSM - Adding Aerial Imagery
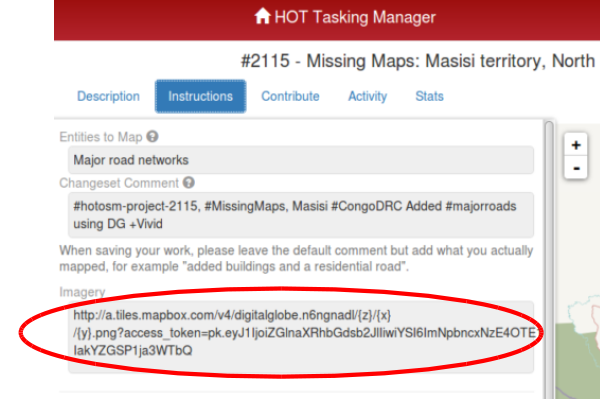
Not all aerial imagery is within the JOSM imagery menu, but it is easy to add if you have been given the link information. In this example we are working from the HOT Tasking Manager and the imagery required to complete one of the projects needs to be manually added to JOSM. The principle of adding the image link is the same whatever the editing you are working on, as long as you are provided with the link. There are also occasions when the intended links do not work as expected and it may be necessary to add the imagery manually, if you can obtain the link information. From the Tasking Manager information tab, or your other source of the information, copy all of the Imagery section.
Go to the Preferences menu of JOSM (Edit / Preferences, or on an Apple machine JOSM / Preferences)
Click on the
Box 1. Paste the information you copied from the Tasking Manager information tab into the first box on the window. JOSM will verify it, and if it is correct the verification process will repeat the information in box 3 (see below). If it does not appear in box 3 within a few seconds, check that you have not accidentally missed letters, or accidentally added ‘white space’ at the beginning or end - just the actual link must be copied and pasted.
Click on the
Click the
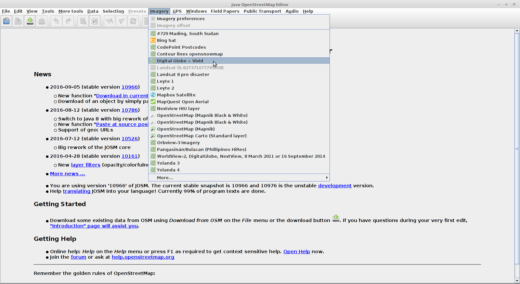
Tip If the imagery fails to load, check how the imagery appears in the list. In this example, tms appears twice. You can edit the link within josm so that it only appears once, which will probably correct the problem.
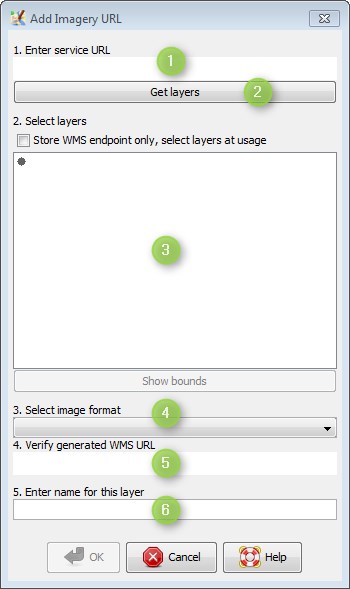
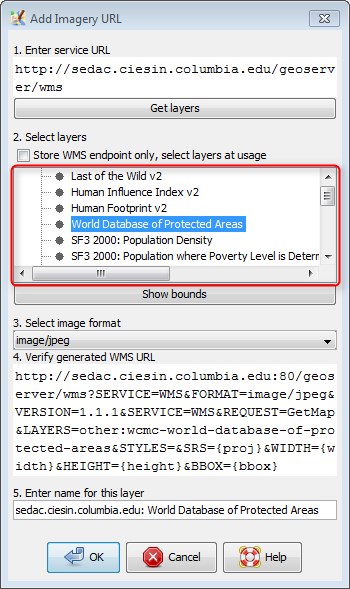
Adding a WMS ServerAdding a WMS server is very similar to adding a TMS server, with one important difference. WMS servers typically provide more than one imagery layer to choose from and you must either select a layer when adding the WMS server in the preferences, or specify that you will select a layer to use whenever you select the server from the Imagery menu in the main JOSM interface. To add a WMS server open the JOSM imagery preferences dialog as shown above, but this time click on the “Add WMS” button The resulting dialog box will look like the one below:
Box 1. Enter the URL of the WMS Server in this field. This should just be a typical URL that starts with http or https
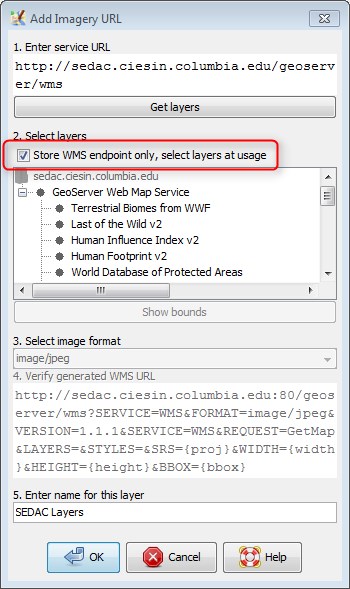
If you would like to choose which layer to load each time you select the server from the Imagery Menu and be able to load multiple layers from the save server easily, just check to box that says “Store WMS endpoint only”. That will also disable selecting a layer and the verify URL field.
Click on the
Click the
Este capítulo foi útil?
Diga-nos e ajude-nos a melhorar os guias!
|

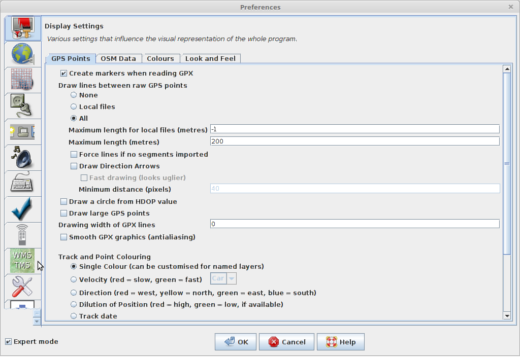
 icon, and in this case the
  icon.
icon.
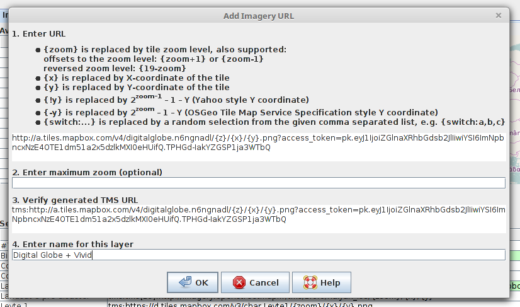
 button, and the imagery you have added will appear at the bottom of the list - you may have to scroll down to locate it.


 Voltar ao início da página