|
|
|
If the user interface of the version you use looks different from the one described here then you should consult our version overview OSM Tasking Manager 2 Project AdminThe OpenStreetMap Tasking Manager 2 is essential to conducting a mapathon, managing a HOT activation, or creating mapping tasks for student mappers. The Tasking Manager divides the work into manageable geographic chunks, which reduces editing conflicts, especially with large numbers of distributed mappers. The Tasking Manager also helps mapping accuracy and data quality by providing a consistent set of instructions for your mappers (e.g. ‘map all roads and buildings’). In short, the Tasking Manager is how you set up and direct the workflow for open mapping activities. This module describes the basic administration of the OSM Tasking Manager for successful mapping events. This guide is specifically written for those persons who need instructions on administration of the OSM Tasking Manager, including the creation and modification of mapping projects for open mapping events, i.e. ‘mapathons’. This guide is applicable to all instances of the OSM Tasking Manager including the HOT Tasking Manager http://tasks.hotosm.org/ and the TeachOSM Tasking Manager http://tasks.teachosm.org/. A list of other instances of the OSM Tasking Manager can be found at the OpenStreetMap wiki The HOT or OSM Tasking Manager is frequently referred to as TM2, as a shorthand for Tasking Manager, version 2. Accesso & Livelli di accessoThe first thing to understand is access level. All access to TM2 is authorized through https://www.openstreetmap.org. To access TM2 you will need an OpenStreetMap (OSM) account. Once you have this account visit http://tasks.hotosm.org/ and click Login to OpenStreetMap, which will refer you back to the OSM page where you can authorize the Tasking Manager to have limited access to your OSM account. Access Levels within the OSM Tasking Manager 2The OSM Tasking Manager 2 has three user access levels:
Initiate a new Project within TM2
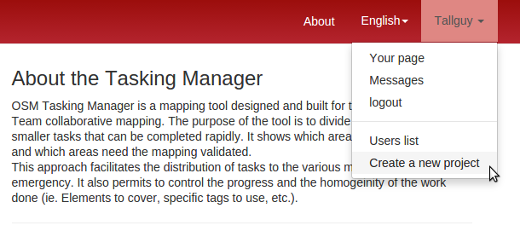
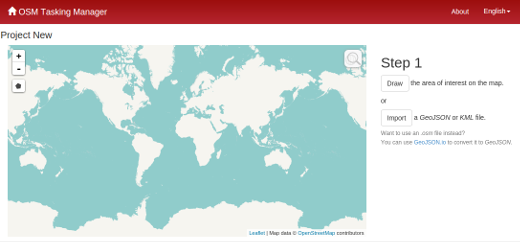
Click your username in the upper right corner, then Create a New Project. You then may choose between drawing your area of interest on the map, or importing a bounding box from a file;
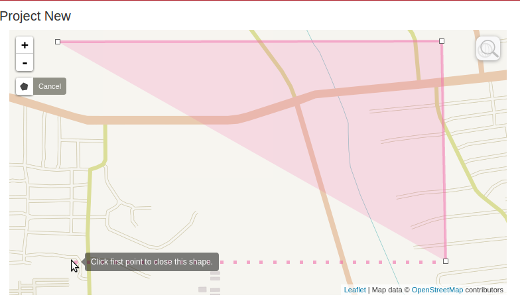
Draw an area of interest to be mapped
o Upload a GeoJSON or KML file of the area of interest to be mapped
Task SquaresThe area of interest defined by the file upload or hand drawn will appear in the map frame, and you will then be asked to choose how the area of interest is split into individual tasks. There are two options:
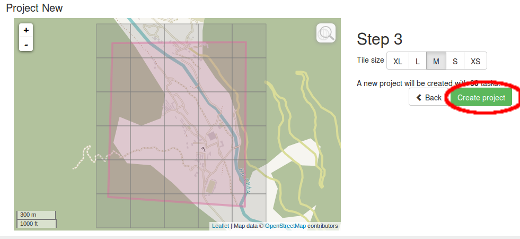
Usare la Griglia quadrata per i riquadri dei taskTo create uniform square tiles, select the Square Grid option and click next.
Considerations before deciding on tile sizes
Geometrie a forma liberaIt is possible if you uploaded a file to define your project area, it could also contain information about the exact shapes you want your project’s individual tasks to be. If the AOI consists of one polygon, the project will have just one task. This is generally not needed and should only be needed for specific needs. Considerazioni sulle foto satellitariIn most cases we use the “standard” Bing imagery. But there are situations where you might want to choose an alternative source:
Se Bing non si dimostra adeguato la scelta successiva è Mapbox. Dovresti cercare altre fonti solo se nessuna di queste due scelte si rivela adeguata ai tuoi bisogni. In such cases it is not sufficient to choose a license-compatible source and make it available through a WMS or TMS service. Your AOI has probably already been partially mapped using Bing or Mapbox imagery and there might be a noticeable offset between images. You must have a close look at various locations of your AOI and determine the offset between your imagery and previously mapped data. If the existing OSM data are offset with respect to your imagery but fit Bing imagery then we usually assume that Bing is the “gold standard” unless we have GPS traces which prove that this assumption is wrong. If there is a constant offset between your imagery and Bing across the AOI then this might be corrected on the server so that images from various sources loaded in the editor match. If this is not possible, if the offset varies across the AOI or if existing data are aligned with various sources then it is time for plan B: The important point is that you must develop a strategy for how to cope with these issues and provide detailed instructions to mappers and validators. We strongly suggest that you declare such a project “for experienced mappers only” and explain that experience in this case does not mean having mapped 200+ buildings but having already dealt with alignment issues and different imagery sources. Una possibile strategia potrebbe comprendere i seguenti passi:
It is important that step 3 is repeated for every task of the project and the individual task squares should not be too large because imagery offsets can vary considerably across an AOI, particularly if the terrain is not flat. Even imagery discontinuities may occur across a project - look out for them and advise the contributors of such a problem. Here are some suggested bits of information which you might include in the project instructions:
Create the project & add descriptionAfter choosing a tile size, click “Create Project”.
This establishes the project in the task manager and opens a screen where you can provide the descriptions, instructions and other information about the project. Keep in mind that this must not be underestimated. A fair share of mappers (in many cases the majority) will have no previous experience with OpenStreetMap and/or HOT and will thus not be familiar with tagging guidelines. It is very important that the objectives of the project are clear and that all resources which the mappers should take into account are laid out here. It is often advisable to confine one project to one class of objects to be mapped. If you need a basemap of an area better split it in several projects, one for the roads, one for the buildings etc. Now beginners can focus on a small class of objects while learning how to map them correctly. Otherwise you might end up with lots of tiles which contain a bit of everything but nothing really complete. Utilizza un linguaggio semplice, chi legge molto spesso non è un madrelingua inglese.
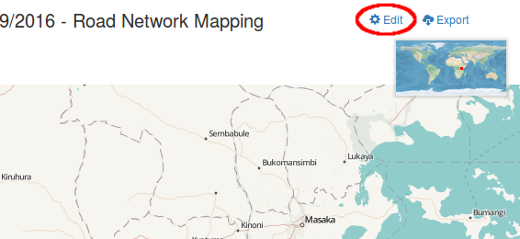
Revisione e pubblicazioneRivedi le varie schede per verificare che la grammatica e la formattazione siano corrette e che le istruzioni siano chiare. Se è necessario cambiare o rifinire il progetto, clicca il link ‘Edit’ nell’angolo in alto a destra della pagina.
Se il progetto è pronto, cliccare il link ‘Pubblica’. Nel momento in cui il progetto è pubblicato diventa disponibile per chiunque abbia un account OSM, a meno di avere specificato un gruppo di utenti nella scheda ‘Utenti ammessi’, nel qual caso solo gli utenti abilitati saranno in grado di lavorare sul progetto. Se necessario è possibile apportare ancora modifiche al progetto dopo la pubblicazione, cliccando sul link ‘Edit’
Questo capitolo è stato utile?
Dacci il tuo parere ed aiutaci a migliorare le guide!
|

