|
|
Survey dengan Menggunakan Field Papers
In this chapter we will see how we can record the coordinates of places without a GPS. We will use a tool called Field Papers, which allows you to print a map of an area, draw on it and add notes, and load the paper back into JOSM, where you can add your locations to OpenStreetMap. You can also watch this 8-minute Tutorial Field Papers video on how to create an atlas and upload a snapshot. Ringkasan Mengenai Field PapersSebelum kita masuk ke detail tentang Field Papers, mari kita lihat ringkasan tentang bagaimana proses bekerjanya:
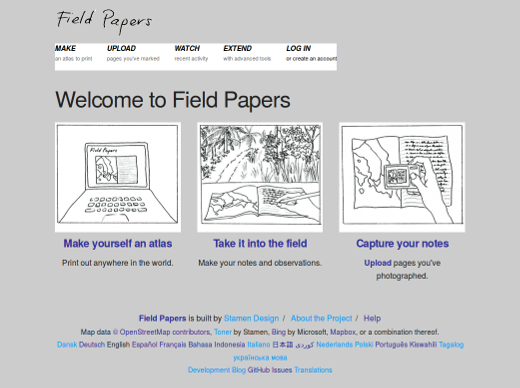
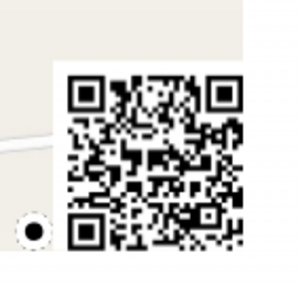
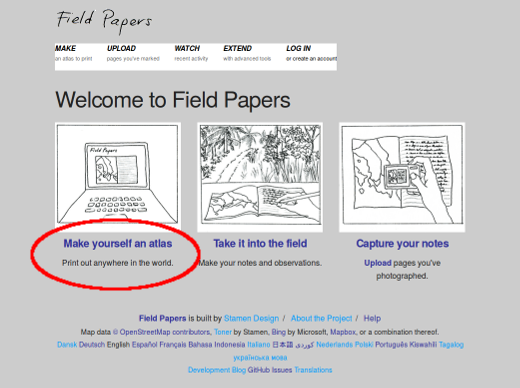
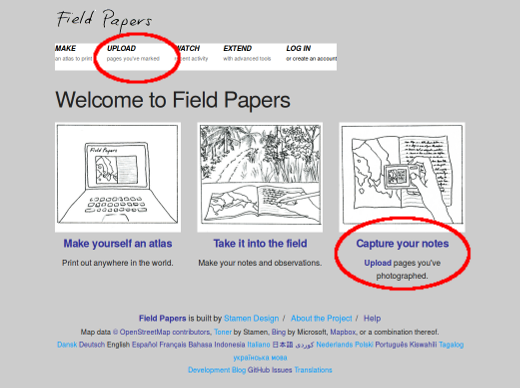
Bagaimana cara kerja Field Papers?Jika Anda mengikuti proses Field Papers yang dijelaskan di atas, Anda akan mengumpulkan koordinat geografis dari tempat survey yang akurat hanya dengan kertas. Bagaimana ini mungkin? Saat Anda mencetak Field Paper, kertas tersebut dilengkapi dengan barcode persegi di bagian bawah halaman. Barcode ini memungkinkan Field Papers untuk menentukan lokasi pasti dari peta yang Anda gunakan untuk mensurvei. Kemudian, ketika Anda memuat kertas kembali ke JOSM, semua objek yang Anda gambar akan ditampilkan di lokasi yang sebenarnya. Ini seperti menggunakan GPS untuk mengumpulkan koordinat yang tepat, tetapi yang Anda butuhkan hanyalah kertas! Sekarang mari pelajari bagaimana cara untuk membuat dan menggunakan Field Papers. Membuat dan MencetakBuka web browser Anda. Pada kotak alamat di jendela bagian atas, ketikkan teks berikut dan tekan Enter: fieldpapers.org Situs web akan terlihat seperti ini:
Klik Make yourself an Atlas untuk memilih area yang ingin Anda cetak.
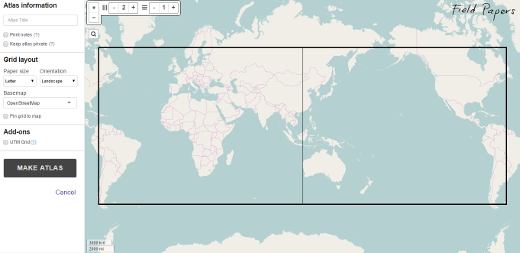
Anda akan diarahkan ke halaman ini:
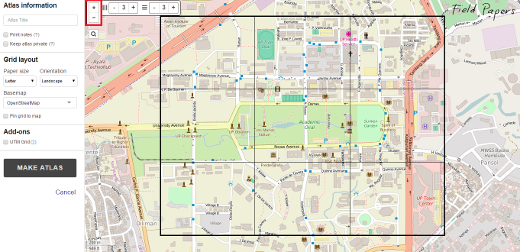
Perbesar ke area yang ingin Anda cetak di kertas. Anda dapat memindahkan peta dengan cara yang sama seperti Anda memindahkan peta di situs web OpenStreetMap, menggunakan tombol kiri mouse Anda untuk menarik peta, dan roda gulir Anda untuk memperbesar dan memperkecil. Mengklik kiri pada tombol (+) dan (-) di sudut kiri atas juga akan memperbesar dan memperkecil.
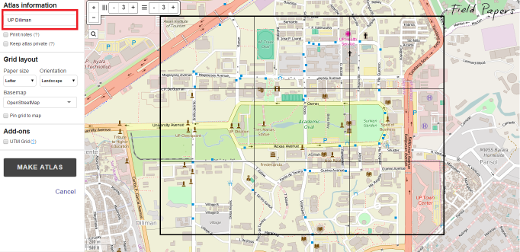
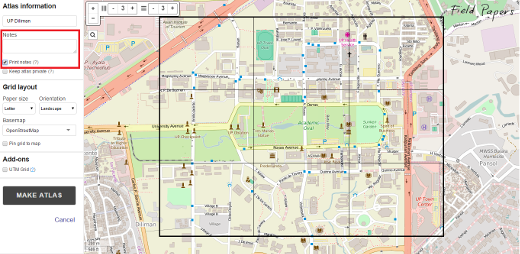
Berikan nama untuk kertas tersebut. Anda juga dapat menambahkan teks yang akan muncul di setiap kertas yang dicetak.
Pilihan selanjutnya memungkinkan Anda memilih layout peta. Jika Anda mencentang kotak di samping “Print Notes”, peta Anda akan dicetak di bagian atas halaman dengan catatan yang ditampilkan di bagian bawah. Jika tidak, peta akan ditampilkan pada halaman penuh.
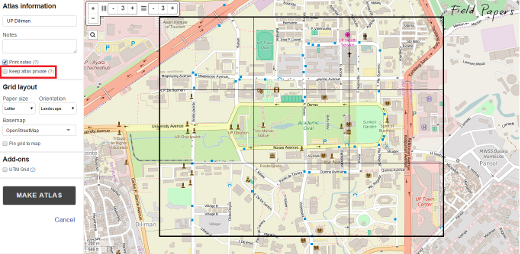
Kotak centang berikutnya memungkinkan Anda merahasiakan atlas Anda. Dengan merahasiakan atlas Anda, atlas hanya dapat diakses setelah Anda masuk, atau melalui tautan yang diberikan kepada Anda pada langkah terakhir.
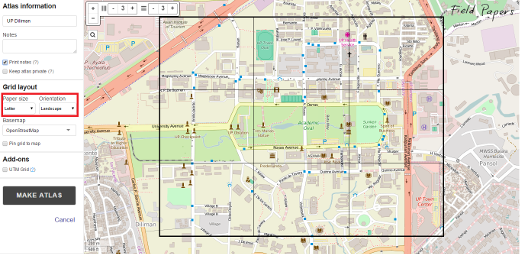
Tepat di samping peta ada beberapa opsi tambahan. Dua opsi pertama memungkinkan Anda untuk memilih ukuran dan orientasi kertas yang ingin Anda gunakan untuk mencetak Field Paper. Anda dapat memilih potret atau lanskap.
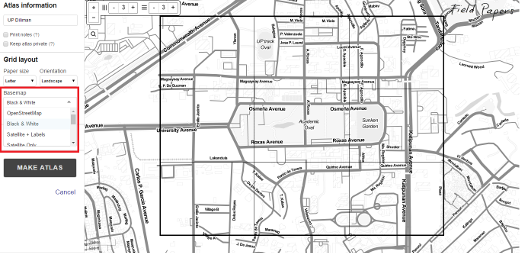
Opsi berikutnya memungkinkan Anda memilih jenis data yang ingin Anda gunakan untuk Field Paper Anda. Di sini Anda dapat memilih dari berbagai opsi yang akan mengubah tampilan peta. Untuk saat ini, kami akan memilih Hitam dan Putih.
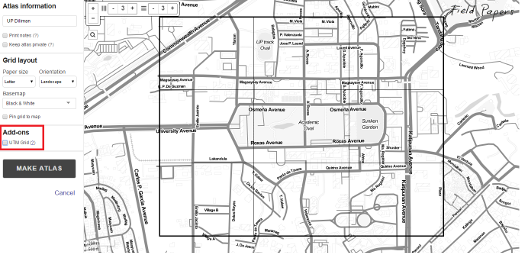
Terakhir, Anda dapat menambahkan grid UTM ke setiap peta jika Anda mau.
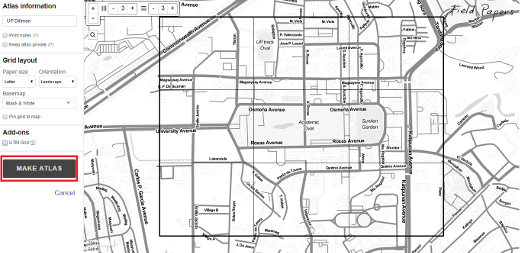
You want to make sure that the window shows the area that you want to map. You can use the controls in the map window to resize the pages of your Field Paper, or to more or fewer pages. Be sure that you papers cover a reasonably small area, or they won’t be of much use when you are walking around. If you make mistakes the first time, don’t worry, you can create as many papers as you need.
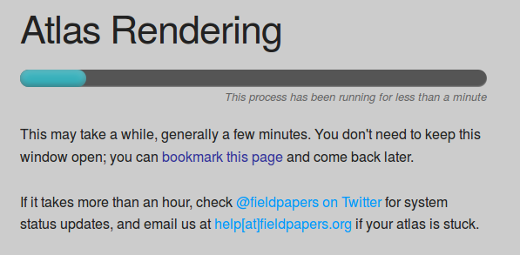
You will see that your new print is being processed. When it is finished, you will see your Field Paper on this page. It usually only take a few minutes for a print to be ready, depending on how many pages you are creating.
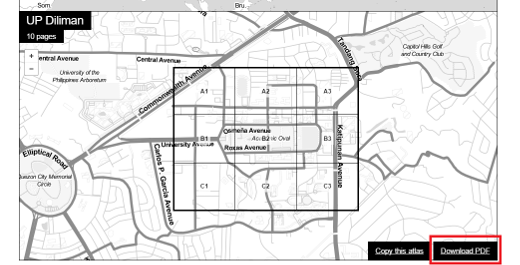
When your print is ready, click “Download map PDF for print”. The Field Paper should begin downloading.
When the download is finished, open the PDF file. Connect your computer to a printer and print the page. If everything goes well, you should now have your map printed on paper. Map with Field Papers
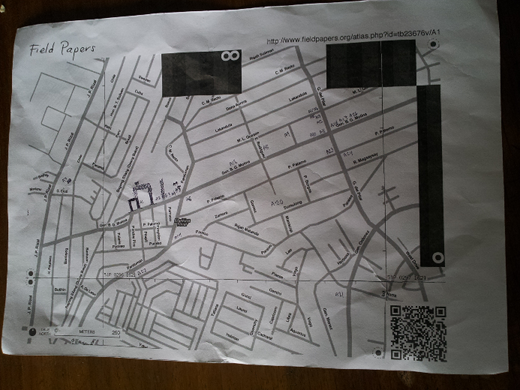
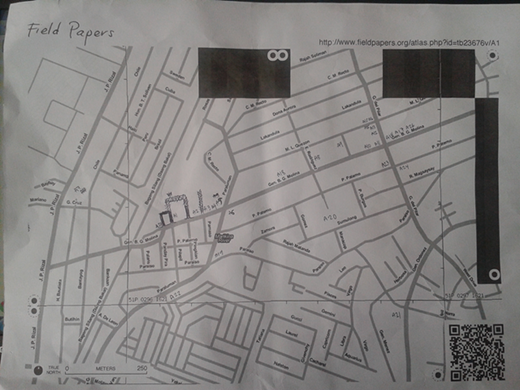
Scan and UploadField Papers are very useful for mapping with nothing more than paper, but they are not 100% magic. We will still need to add our paper into JOSM, add our information digitally, and save our changes on OpenStreetMap. The first step is to scan your Field Papers into your computer. You can do this by attaching a scanner to your computer, scanning the paper, and saving it as an image file. If you don’t have a scanner, you can take a photograph of the paper, but you should be careful to take a very good photo. Make sure that the paper is flat and your camera is directly in front of it. Be sure to include the barcode in the image, as Field Papers will not work without it. Here is an example of a scanned/photographed image:
Once you have your Field Paper scanned and saved on the computer, open your web browser and return to fieldpapers.org, just as before.
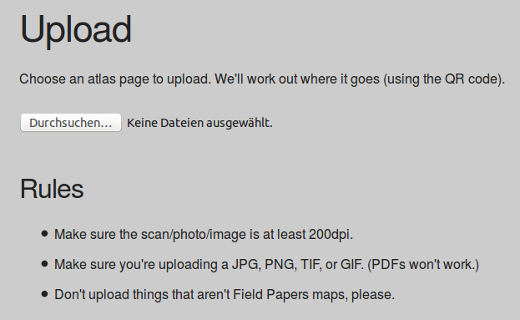
Click “Choose File” and navigate to the file where you scanned/photographed your Field Papers.
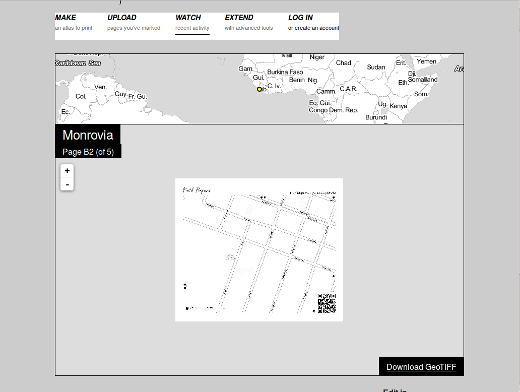
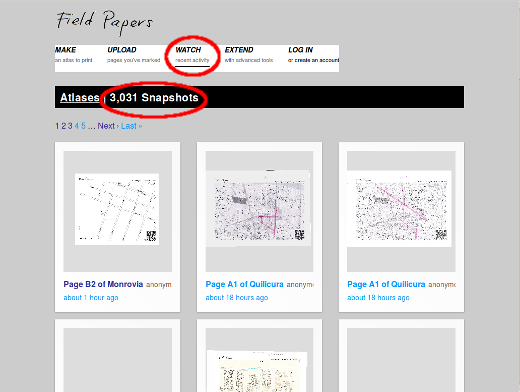
It may take a few minutes for your paper to upload, depending on the speed of your internet connection. When the upload finishes, you will see something like this:
If you are not going to work with these data in JOSM right now then it is a good idea to bookmark this snapshot page. Add the Field Papers PluginBefore we can open the Field Paper in JOSM, we need to install the JOSM Field Papers plugin.
Open in JOSMNow can load your Field Paper into JOSM and use it to add the information you collected to OpenStreetMap. Unless you still have the web page with your snapshots open or stored a bookmark to it, return to the Field Papers website, by typing fieldpapers.org in your web browser, just as before.
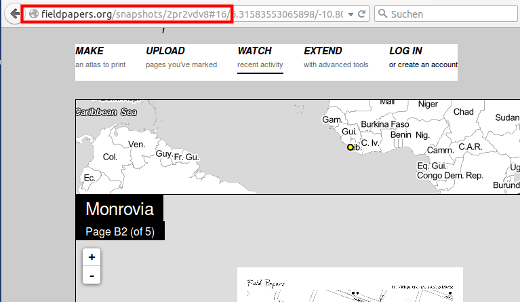
To load the paper into JOSM, we need to copy the snapshot ID of the Field Papers you have scanned. In the URL bar at the top of your internet browser, select the text and press CTRL+C on your keyboard to copy. The text should look similar to this: http://fieldpapers.org/snapshot.php?id=zqw8m33x#16/14.6582/121.1098
On the top menu of JOSM, Click “Field Papers”. Then click “Scanned Map…”
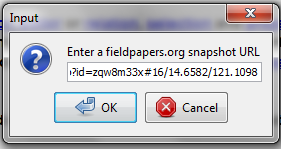
Press CTRL+V on your keyboard to paste the text that you copied from the Field Papers website.
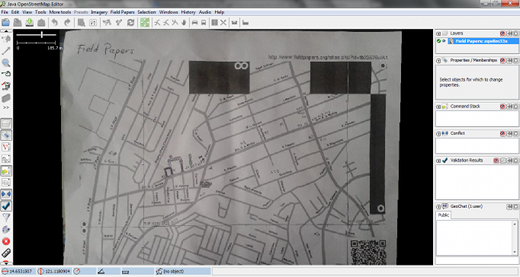
Click OK. If all went well, you should see your Field Paper load into JOSM. In the next chapter, we will see how to add the places that you mapped into OpenStreetMap.
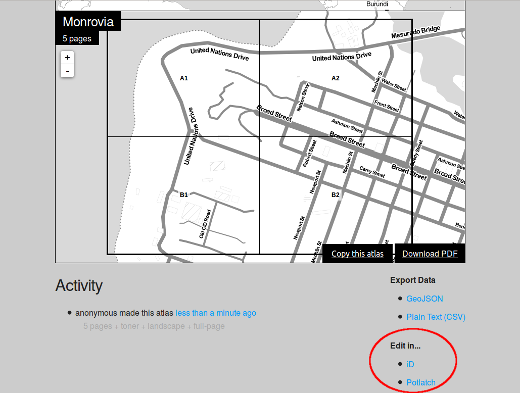
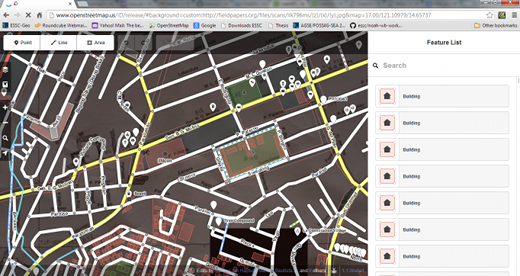
You can also use your scanned Field Papers in other OSM online editors such as iD or Potlatch2 by clicking the “Edit in iD” or “Edit in Potlatch” links in the scanned Field Papers page.
Repeat!After you add your changes to OSM, they will be saved on the map. Then the next time you want to improve the map, you can print out a new Field Papers which will include the changes that you made. As this process is repeated, the map will get better and better, the more you map! SummaryCongratulations! In this chapter you learned the process of using Field Papers and how they work. You learned how to print, map, and scan a Field Paper, and how you can use them to improve OpenStreetMap.
Apakah bab ini bermanfaat?
Beri tahu kami, dan bantu kami memperbaiki panduan OSM!
|



 Kembali ke bagian atas halaman