- Other guides
- Panduan bagi pemula
- JOSM - Editing Lebih Detil
- Memulai JOSM
- Proses Mengedit dengan JOSM
- Mengedit Data Lapangan
- Alat Editing JOSM
- Plugin JOSM
- Tool JOSM Lainnya
- Preset JOSM
- Membuat Kustom Presets
- Relasi JOSM
- Tips Editing
- Citra Udara
- Menambahkan tms, wms atau citra wmts di JOSM
- Pergeseran Citra Satelit
- Penyelesaian Konflik di JOSM
- Koordinasi
- Mapping with a SmartPhone, GPS or Paper
- Data OSM
- HOT Tips - Memulai untuk pembuat peta pemula - iD editor
|
|
JOSM - Menambahkan Foto Udara
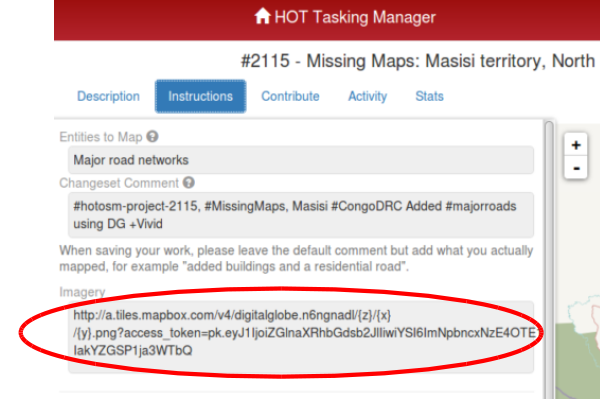
Tidak semua foto udara tersedia di menu imagery di JOSM, tapi sangat mudah untuk menambahkan foto udara jika Anda sudah diberikan tautan informasinya. Pada contoh ini kita bekerja dari HOT Tasking Manager dan citra yang dibutuhkan untuk menyelesaikan pekerjaan ini telah ditambahkan manual di JOSM. Prinsip dasar menambahkan tautan foto udara adalah sama tidak peduli dimana Anda sedang memetakan, selama Anda memiliki tautan aktif dan tersedia. Ada juga kesempatan ketika tautan yang dimaksud tidak berfungsi seperti yang diharapkan dan mungkin perlu menambahkan citra secara manual, jika Anda dapat memperoleh informasi tautan tersebut. From the Tasking Manager information tab, or your other source of the information, copy all of the Imagery section.
Pergi ke menu Preferences di JOSM (Edit / Preferences, atau di Apple JOSM / Preferences)
Klik pada ikon
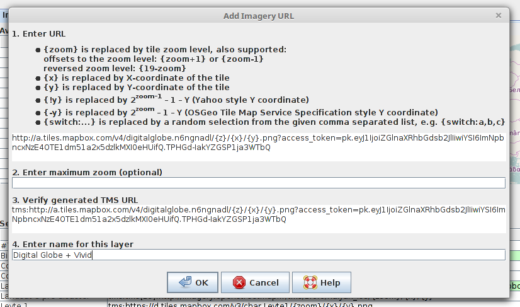
Box 1. Paste the information you copied from the Tasking Manager information tab into the first box on the window. JOSM will verify it, and if it is correct the verification process will repeat the information in box 3 (see below). If it does not appear in box 3 within a few seconds, check that you have not accidentally missed letters, or accidentally added ‘white space’ at the beginning or end - just the actual link must be copied and pasted.
Click on the
Click the
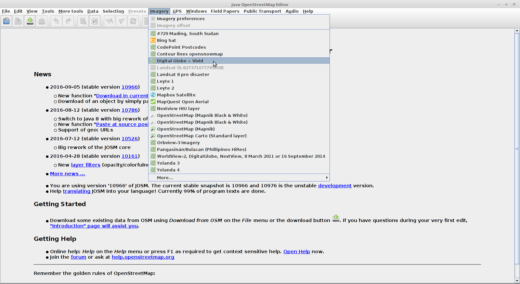
Tip If the imagery fails to load, check how the imagery appears in the list. In this example, tms appears twice. You can edit the link within josm so that it only appears once, which will probably correct the problem.
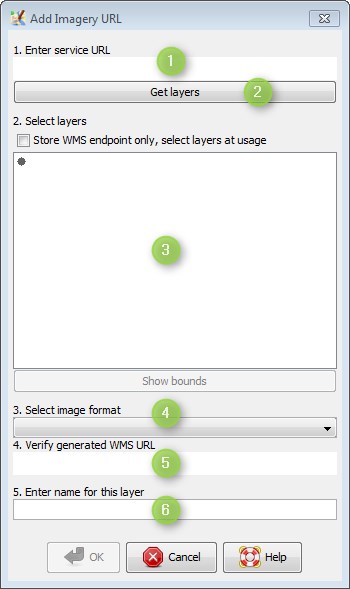
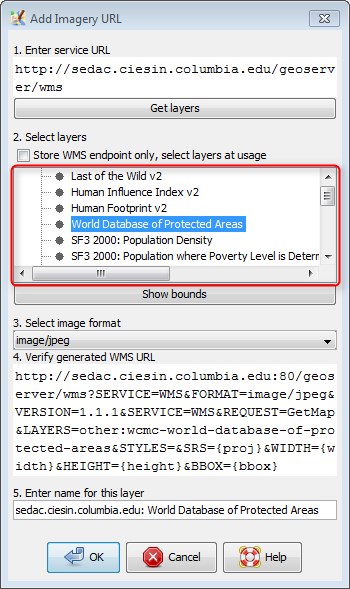
Adding a WMS ServerAdding a WMS server is very similar to adding a TMS server, with one important difference. WMS servers typically provide more than one imagery layer to choose from and you must either select a layer when adding the WMS server in the preferences, or specify that you will select a layer to use whenever you select the server from the Imagery menu in the main JOSM interface. To add a WMS server open the JOSM imagery preferences dialog as shown above, but this time click on the “Add WMS” button The resulting dialog box will look like the one below:
Box 1. Enter the URL of the WMS Server in this field. This should just be a typical URL that starts with http or https
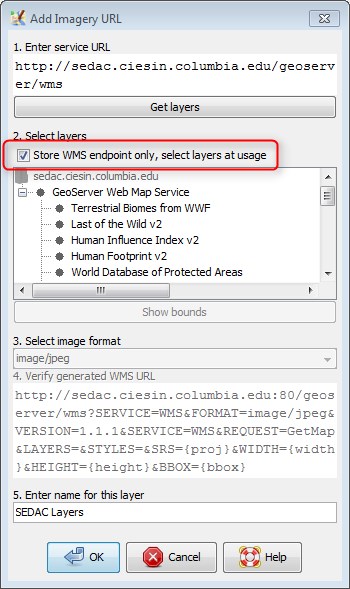
If you would like to choose which layer to load each time you select the server from the Imagery Menu and be able to load multiple layers from the save server easily, just check to box that says “Store WMS endpoint only”. That will also disable selecting a layer and the verify URL field.
Click on the
Click the
Apakah bab ini bermanfaat?
Beri tahu kami, dan bantu kami memperbaiki panduan OSM!
|

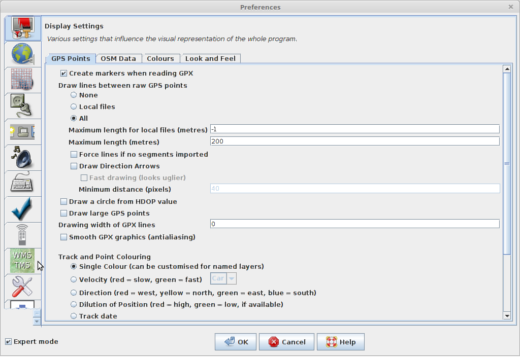
 , dan dalam kasus ini ikon
  .
.
 button, and the imagery you have added will appear at the bottom of the list - you may have to scroll down to locate it.


 Kembali ke bagian atas halaman